
Un boîtier PMMA transparent sort de la machine CNC avec les bonnes dimensions extérieures. Le plan indique que la pièce devrait fonctionner. Pourtant, à l'inspection, ses bords semblent laiteux, un trou percé présente une fine fissure, la poche comporte des marques de fraise visibles, et le polissage demande bien plus de main-d'œuvre que prévu. C'est l'un des défis centraux de l'usinage de l'acrylique PMMA: produire la forme est souvent plus facile que de produire simultanément la forme, la clarté, la stabilité dimensionnelle et la finition cosmétique.
Pour un ingénieur ou un acheteur, cette différence compte. Le PMMA peut sembler un plastique simple, mais il réagit fortement à la chaleur, à l'affûtage des outils, à la pression de serrage, à l'évacuation des copeaux, à la séquence d'usinage, aux contraintes et à la finition. Un procédé qui fonctionne bien sur l'aluminium peut endommager l'acrylique en quelques secondes. Un procédé qui produit un prototype acceptable peut aussi devenir coûteux ou instable lorsque les quantités augmentent.
La solution ne consiste pas simplement à ralentir la machine, à augmenter la vitesse de broche ou à polir chaque surface après coup. Une production fiable du PMMA exige une stratégie d'usinage complète dans laquelle la nuance de matériau, l'équipement, les fraises, les avances, le montage, l'ébauche, la finition, l'inspection et le post-traitement fonctionnent ensemble.
Ce guide suit ce problème de fabrication, de la défaillance à la solution. Il explique comment le procédé fonctionne, quelles machines et quels outils peuvent convenir, pourquoi les pièces transparentes échouent, comment établir une procédure de production pratique, où le PMMA est couramment utilisé, et ce que les acheteurs doivent évaluer avant de choisir un fournisseur CNC tel que JUCHENG.
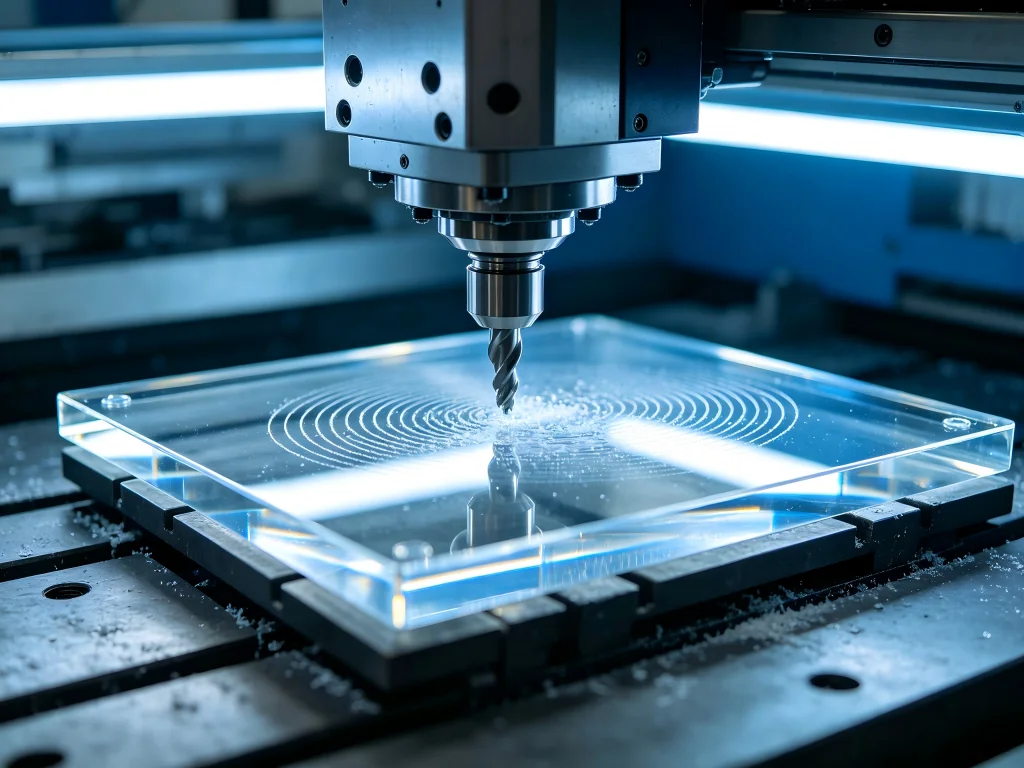
Le vrai problème : un matériau transparent expose les erreurs de fabrication
De nombreux défauts d'usinage CNC peuvent se cacher sur un composant technique opaque. Les marques d'outil à l'intérieur d'un boîtier POM noir peuvent avoir peu d'effet sur sa valeur commerciale. Des différences cosmétiques mineures sur un support en aluminium peuvent disparaître après anodisation.
L'acrylique transparent se comporte différemment parce que le client peut voir l'historique de fabrication.
Les marques d'outil sont visibles. L'écaillage est visible. Les contraintes internes peuvent finir par devenir visibles. Un polissage médiocre est visible. Une petite rayure causée par une manipulation négligente peut rester évidente après que le composant a passé l'inspection dimensionnelle.
Cela signifie que la fabrication du PMMA implique souvent trois définitions distinctes de la qualité :
- Qualité géométrique : Les dimensions, trous, poches, rayons, planéité, positions et interfaces d'assemblage sont-ils corrects ?
- Qualité de surface : Les marques d'usinage, rayures, éclats de bord, bavures, voiles et défauts de polissage sont-ils conformes au standard cosmétique convenu ?
- Intégrité du matériau : L'usinage a-t-il introduit une chaleur excessive, des contraintes, des fissures ou d'autres conditions susceptibles de provoquer une défaillance ultérieure ?
Un fournisseur pourrait satisfaire la première exigence tout en échouant aux deux autres.
C'est pourquoi un projet professionnel d'usinage CNC de l'acrylique ne devrait pas commencer par la question : “ Quelle tolérance votre machine peut-elle tenir ? ” Il devrait commencer par une question plus large : “ Que doit faire ce composant après l'usinage, la finition, l'assemblage, le nettoyage et l'utilisation réelle ? ”
Qu'est-ce que le PMMA et pourquoi son comportement importe-t-il ?
Le PMMA est le polyméthacrylate de méthyle, un thermoplastique transparent communément appelé acrylique. Les utilisateurs commerciaux peuvent également le reconnaître sous des noms tels que verre acrylique, Plexiglas, Perspex ou Lucite.
Son principal attrait technique réside dans la combinaison de transparence, de rigidité, de faible poids, de résistance aux intempéries, de flexibilité de conception et d'usinabilité. Selon le grade et l'application, le PMMA peut offrir un aspect attrayant semblable au verre sans nécessiter les méthodes de fabrication associées au verre conventionnel.
L'usinage CNC rend le matériau encore plus utile car les ingénieurs peuvent créer plus que des profils plats.
Un centre d'usinage peut produire :
- des poches et cavités de précision ;
- des trous de montage et des lamages ;
- des canaux et des chemins d'écoulement ;
- des filetages et des caractéristiques d'insert ;
- des surfaces courbes ou tridimensionnelles ;
- caractéristiques optiques et d'éclairage ;
- marquages gravés ;
- boîtiers multi-faces ;
- lentilles prototypes et composants de gestion de la lumière ;
- assemblages techniques transparents complexes.
Cela crée un pont important entre le prototypage et la production. Une équipe de développement peut usiner plusieurs versions d'un composant transparent sans s'engager dans un outillage de moulage par injection. Les modifications de CAO peuvent être introduites rapidement, testées, mesurées et révisées.
Cependant, le comportement thermique et mécanique du PMMA explique pourquoi le contrôle du processus est si important.
Le métal conduit la chaleur d'usinage hors de la zone de coupe de manière relativement efficace. L'acrylique ne se comporte pas de la même manière. Si la chaleur s'accumule autour de l'outil de coupe, le polymère peut se ramollir. Une fois que le matériau ramolli adhère à l'arête de coupe, les performances de l'outil peuvent se détériorer rapidement. Au lieu de créer un copeau net, l'outil peut commencer à frotter, à étaler ou à recouper le matériau ramolli.
L'opérateur peut alors observer exactement les symptômes dont se plaignent les acheteurs : bords fondus, copeaux collants, surfaces blanches, variation dimensionnelle, parois rugueuses ou un outil de coupe qui semble recouvert de plastique.
Un usinage fiable dépend donc de la création d'un copeau et de l'évacuation de ce copeau hors de la pièce.
Défaut n° 1 : l'acrylique fond au lieu de se couper proprement
La fusion est probablement le problème d'usinage CNC de l'acrylique le plus discuté, car elle crée une défaillance immédiate et évidente.
Un opérateur ouvre la porte de la machine et découvre du matériau enroulé autour de la fraise. Le bord semble étalé plutôt que net. Les petits copeaux se sont transformés en dépôts filandreux ou soudés. La qualité de surface s'effondre.
La réponse intuitive consiste parfois à réduire l'avance, car un mouvement plus lent semble plus sûr.
Cela peut aggraver le problème.
Si la broche continue de tourner rapidement alors que l'avance devient très faible, chaque arête de coupe peut enlever trop peu de matière. Au lieu de produire un copeau utile, l'outil passe plus de temps à frotter le polymère. La friction génère de la chaleur. Le matériau se ramollit, adhère à l'outil et produit encore plus de friction.
La relation importante n'est donc pas la vitesse de broche seule, ni l'avance seule. C'est la relation entre la géométrie de l'outil, le nombre de dents, la vitesse de broche, l'avance, l'engagement, le matériau et la formation du copeau.
Comment le processus doit être corrigé
Une stratégie de coupe stable cherche généralement à former un copeau défini, à l'évacuer efficacement et à empêcher que le matériau chaud soit recoupé.
La fenêtre de paramètres exacte dépend de la machine, du diamètre de l'outil, du nombre de dents, de la rigidité, de la géométrie de la pièce, de la profondeur de passe, de la nuance de PMMA et de l'exigence de finition. Il n'existe pas de valeur de tr/min universelle qui fonctionne pour chaque projet.
Cependant, plusieurs principes de processus restent utiles.
L'outil doit être affûté. La géométrie de l'outil doit favoriser la coupe du plastique et l'évacuation des copeaux. L'avance doit être suffisante pour que l'outil coupe plutôt qu'il ne frotte. L'engagement de l'outil ne doit pas créer de chaleur inutile. Les copeaux doivent quitter rapidement la zone de coupe. Un soufflage d'air ou une approche de refroidissement appropriée peut faciliter l'évacuation des copeaux lorsque le processus et la spécification du matériau le permettent.
Les communautés CNC en ligne décrivent fréquemment le même schéma. Les utilisateurs rapportent souvent que le passage d'outils multidents polyvalents à des fraises appropriées à une dent ou à goujure en O, tout en maintenant une avance correcte et en évacuant les copeaux à l'air, peut transformer l'usinage de l'acrylique d'un problème de fusion en une opération de coupe propre.
Cette expérience utilisateur est mécaniquement logique. Un grand espace de goujure donne aux copeaux un endroit où aller. Une arête affûtée réduit le frottement. Une évacuation efficace réduit le recoupage. Le résultat peut être une accumulation de chaleur plus faible et des parois plus régulières.
Échec n° 2 : les dimensions sont correctes mais la pièce paraît blanche
Les bords opaques et les surfaces usinées laiteuses créent une autre situation déroutante.
L'acheteur peut recevoir une pièce techniquement transparente lorsqu'on la regarde à travers les surfaces de matière non usinées, mais chaque paroi usinée paraît blanche ou dépoli.
Ce n'est pas nécessairement la preuve que le matériau lui-même est de mauvaise qualité.
Une surface usinée contient des marques de coupe microscopiques. Ces irrégularités diffusent la lumière. Plus la surface devient irrégulière, moins elle paraît optiquement claire.
Une chaleur excessive peut aggraver le problème, mais même une opération de fraisage stable ne crée pas automatiquement une surface transparente de qualité optique.
Cette distinction est essentielle lors de la spécification d'une pièce.
“ PMMA transparent ” décrit le matériau.
“ Surface usinée optiquement transparente ” décrit un résultat qui peut nécessiter un usinage et une finition dédiés.
Commencez par une meilleure surface usinée
Le processus de polissage le plus économique commence par un bon usinage.
Supposons qu'un fournisseur dégrossisse agressivement une paroi extérieure et laisse de profondes marques d'outil. Un technicien peut avoir besoin d'un ponçage et d'un polissage importants pour les éliminer.
Un autre fournisseur sépare l'ébauche et la finition. L'opération d'ébauche laisse une surépaisseur contrôlée. Un outil de finition affûté enlève ensuite une petite quantité de matière dans des conditions stables et produit une paroi plus uniforme.
Les deux pièces peuvent éventuellement paraître transparentes.
Mais la seconde voie pourrait nécessiter beaucoup moins de main-d'œuvre secondaire et préserver la géométrie de manière plus fiable.
Ceci est particulièrement important car le polissage enlève de la matière. Un fournisseur ne peut pas améliorer indéfiniment l'aspect sans tenir compte de la variation dimensionnelle, de la forme des arêtes, de la planéité et de la géométrie locale.
Pour les composants transparents à tolérance serrée, l'usinage et la finition doivent donc être planifiés comme un seul système de fabrication plutôt que comme des services indépendants.
Défaut n° 3 : Un trou semble correct aujourd'hui et se fissure plus tard
La fissuration différée peut être plus dangereuse qu'un défaut d'usinage évident, car la pièce peut déjà avoir passé l'inspection.
Un boîtier transparent pourrait quitter l'usine avec des dimensions conformes et un bon aspect visuel. Après l'installation de vis, le transport, le nettoyage ou l'exposition à un produit chimique, de fines fissures peuvent commencer à se former autour d'un trou ou d'une arête sollicitée.
Ce type de défaillance met en évidence le rôle des contraintes résiduelles.
Les contraintes peuvent provenir de la production de la matière première, de l'usinage agressif, de mauvaises conditions de perçage, du bridage, des effets thermiques, du polissage, du collage ou de l'assemblage final.
La conception peut ajouter une couche de risque supplémentaire.
Un petit trou situé trop près d'un bord crée une zone plus fragile. Une vis à tête fraisée peut générer une contrainte locale élevée. Une fixation serrée comme si le boîtier était en aluminium peut surcharger le polymère. Un cadre métallique rigide peut contraindre les mouvements thermiques.
En d'autres termes, la fissuration du PMMA ne doit pas être automatiquement imputée à un “ mauvais plastique ”.”
La cause profonde peut impliquer le matériau, l'usinage, la conception, l'assemblage ou une exposition chimique.
Une stratégie de perçage plus fiable
Le perçage doit être traité comme une opération de coupe contrôlée plutôt que de forcer un foret conventionnel à travers une plaque ou un bloc transparent aussi rapidement que possible.
Une géométrie d'outil adaptée peut réduire les contraintes au niveau de l'arête de coupe. L'évacuation des copeaux est importante car les copeaux accumulés ajoutent de la chaleur. Le perçage débouchant mérite une attention particulière car la matière non soutenue autour de la sortie peut s'ébrécher.
Pour les trous critiques, le fabricant peut utiliser un processus par étapes ou usiner la caractéristique par fraisage plutôt que par perçage conventionnel, selon le diamètre, la géométrie, la tolérance, l'épaisseur de paroi et l'équipement.
Les recommandations de mise en œuvre du PLEXIGLAS soulignent également que le foret lui-même n'est pas nécessairement le facteur décisif ; la géométrie de coupe du foret est essentielle pour produire des trous précis dans l'acrylique.
Cela conduit à une question d'achat pratique :
Au lieu de demander uniquement à un atelier CNC s'il peut percer le trou, demandez-lui comment il prévoit d'usiner, d'inspecter et de protéger un trou à fortes contraintes dans un composant transparent.
Acrylique coulé ou acrylique extrudé ?
Avant même la création du programme CNC, le choix de la matière première peut déjà influencer le résultat.
Le PMMA coulé et le PMMA extrudé sont tous deux de l'acrylique, mais leur historique de fabrication et leur comportement à l'usinage diffèrent.
Le PMMA coulé est souvent choisi pour les applications CNC exigeantes car il offre généralement des caractéristiques d'usinage, une qualité optique et un comportement thermique favorables. Le PMMA extrudé peut offrir une épaisseur de feuille constante et un coût de matériau potentiellement inférieur pour les projets appropriés, mais il peut être plus sensible à la chaleur et aux contraintes internes lors de l'usinage.
Cela ne signifie pas que le matériau extrudé est inutilisable.
Cela signifie que le matériau doit suivre l'application plutôt que d'être choisi uniquement en fonction du prix unitaire.
| Domaine de décision | PMMA coulé | PMMA extrudé | Considération de l'acheteur |
|---|---|---|---|
| Usinage CNC de précision | Souvent préféré pour l'usinage exigeant | Peut être usiné avec des paramètres contrôlés | Tenir compte de la géométrie, des contraintes et des besoins de finition |
| Travaux optiques / esthétiques | Choix solide pour les pièces transparentes haut de gamme | Convient à de nombreuses pièces transparentes générales | Définir l'exigence optique réelle |
| Sensibilité thermique pendant la coupe | Comportement d'usinage généralement favorable | Peut nécessiter un contrôle thermique plus étroit | L'expérience du procédé du fournisseur compte |
| Régularité de l'épaisseur de la tôle | Peut présenter davantage de variations liées à la production | Offre souvent une épaisseur de tôle régulière | Pertinent pour les conceptions à base de tôle |
| Priorité au coût | Peut coûter plus cher selon la nuance | Peut être économique pour les applications adaptées | Comparez le coût total de fabrication, pas seulement le prix de la matière |
| Pièce optique usinée complexe | Souvent le point de départ le plus sûr | Nécessite une revue de l'application | Prototype avant production en série |
| Fenêtre ou panneau simple | Adapté | Souvent adapté | La CNC n'est pas toujours le procédé le plus économique |
Les recommandations de JUCHENG en matière de matériau PMMA mettent particulièrement l'accent sur l'acrylique coulé pour les pièces de précision telles que les composants optiques, les guides de lumière, les collecteurs médicaux et les produits transparents haut de gamme.
Pour un acheteur, c'est un exemple utile de la raison pour laquelle une demande de devis (RFQ) doit préciser davantage que “ acrylique, transparent ”.”
Si l'équipe d'ingénierie connaît déjà la nuance requise, il faut l'indiquer. Dans le cas contraire, décrivez la fonction, les conditions environnementales, les exigences de surface et le volume afin que le fournisseur d'usinage puisse discuter des options appropriées.
La Procédé d'usinage de l'acrylique PMMA: De la CAO à la pièce transparente
Un procédé robuste est plus facile à comprendre si l'on suit le composant tout au long de la production plutôt que de traiter le fraisage, le polissage et le contrôle comme des opérations indépendantes.
Étape 1 : Examiner la conception avant de découper la matière
La première décision de fabrication doit être prise dès l'étape de la CAO.
Un fournisseur doit examiner l'épaisseur de paroi, la profondeur des poches, l'accès des outils, les rayons internes, la géométrie de perçage, la distance trou-bord, les filetages, l'état de surface, la répartition des tolérances, les contre-dépouilles et les surfaces visibles.
Cette revue DfM peut éviter des erreurs coûteuses.
Par exemple, un ingénieur peut spécifier un angle interne parfaitement vif parce que le logiciel de CAO permet de le dessiner facilement. Une fraise à bout rond conventionnelle ne peut pas créer cet angle directement. Le fournisseur peut avoir besoin d'une fraise plus petite, d'un autre procédé, d'une modification de conception ou d'une fonction de dégagement.
De même, une poche transparente très profonde et étroite peut sembler simple en CAO mais nécessiter une fraise longue et fine. La déflexion de l'outil et les vibrations pourraient alors endommager la qualité des parois.
La bonne question n'est pas : “ La CNC peut-elle réaliser ceci ? ”
L'usinage moderne peut produire des géométries remarquablement complexes.
La meilleure question est : “ Peut-on le fabriquer de manière répétée, économique et à la qualité requise ? ”
Étape 2 : Vérifier le PMMA brut
L'identité du matériau doit être confirmée avant la production.
Pour les projets sensibles à la qualité, la traçabilité peut devenir importante. Les applications médicales, automobiles, analytiques et réglementées peuvent exiger une documentation reliant le composant fini à la source ou au lot de matériau spécifié.
Le stock doit également être contrôlé pour détecter les rayures, la contamination, les dommages de surface, l'épaisseur ou d'autres conditions susceptibles d'affecter l'aspect final.
Cela importe car les composants transparents sont exceptionnellement sensibles à la manipulation.
Un centre d'usinage ne peut pas éliminer une rayure profonde d'une face optique intacte, sauf si cette face est intentionnellement reprise.
Étape 3 : Planifier le maintien en position
La pièce doit être maintenue suffisamment solidement pour résister aux forces de coupe, mais pas de manière si agressive que le montage devienne lui-même une source de problème.
Plusieurs approches peuvent être appropriées :
- mors doux profilés autour du composant ;
- maintien en position par le vide pour les géométries de type tôle ;
- plaques de support sacrificielles ;
- montages personnalisés ;
- serrage à faible déformation ;
- languettes ou éléments de matière temporaires ;
- montages multi-opérations conçus pour protéger les faces esthétiques.
La méthode dépend de la géométrie et de la quantité.
Une plaque mince transparente et un bloc optique épais ne devraient pas automatiquement utiliser la même stratégie de maintien en position.
Pour les séries de production, des montages dédiés peuvent ajouter un coût initial mais améliorer la régularité et réduire le temps de manutention. Pour les prototypes unitaires, un maintien en position plus flexible peut être économique.
Étape 4 : Sélectionner les outils pour la matière
L'usinage de l'acrylique fait partie de ces applications où le choix de la fraise peut changer l'ensemble du processus.
L'objectif est une action de coupe nette avec suffisamment d'espace de goujure pour évacuer les copeaux.
Les fraises à une goujure et les fraises en O sont des choix courants en usinage des plastiques, car leur géométrie peut favoriser une évacuation efficace des copeaux. Selon la machine, la géométrie et les exigences de finition, d'autres outils en carbure peuvent également donner de bons résultats.
Le point important est que l'outil doit être sélectionné pour l'opération.
Un outil d'ébauche résout un problème différent de celui d'une fraise de finition.
Un foret résout un problème différent de celui d'une fraise en bout.
Un outil utilisé pour une paroi finale transparente ne doit pas être automatiquement traité de la même manière qu'un outil retirant de la matière en masse dans une poche invisible.
Étape 5 : Établir les paramètres de coupe
C'est ici que le développement de procédé expérimenté devient précieux.
Il existe une forte demande de recherche pour des “ avances et vitesses PMMA ” universelles, mais les tableaux de paramètres peuvent créer une fausse confiance.
Imaginez deux ateliers utilisant une fraise de 6 mm.
La première machine est une défonceuse légère à rigidité limitée avec une broche à grande vitesse. La seconde est un centre d'usinage industriel avec un maintien de pièce rigide, une capacité contrôlée de liquide de refroidissement ou d'air, et une géométrie d'outil différente.
Le même réglage numérique peut produire des résultats complètement différents.
Un procédé pratique commence donc par une plage de paramètres validée, puis prend en compte la formation des copeaux, la charge de la broche, le bruit, l'aspect de surface, la température, l'accumulation sur l'outil et les résultats dimensionnels.
Un usinage stable produit des copeaux plutôt que de la pâte fondue.
Cette observation est l'un des outils de diagnostic les plus simples disponibles.
Étape 6 : Ébaucher sans détruire la finition future
L'ébauchage élimine efficacement la matière en masse, mais il doit laisser le composant dans un état pouvant être fini de manière prévisible.
Une erreur courante consiste à pousser l'ébauchage si agressivement que les parois minces se déforment, que les bords s'écaillent ou que des marques profondes subsistent sur des surfaces nécessitant ultérieurement un polissage.
Une bonne planification du procédé tient compte de ce qui suit.
If a wall will receive a precision finishing cut, roughing may leave a controlled amount of stock. If the component contains thin features, the machining sequence may preserve surrounding material temporarily to support them.
If the workpiece requires several setups, the process may delay sensitive cosmetic operations until damaging handling is finished.
This is where CAM strategy becomes part of quality engineering.
Stage 7: Finish Machine Critical Surfaces
A dedicated finishing pass could provide a more stable final dimension and better surface than expecting a heavy roughing pass to achieve both goals.
The finishing cutter should be in good condition. Tool engagement can be reduced. Entry and exit can be planned to avoid marks on critical edges. Cutting direction and path strategy may be adjusted based on testing.
The manufacturer may also distinguish between functional and cosmetic surfaces.
A mounting surface may need flatness and dimension.
An outside transparent wall may need appearance.
An optical feature may need still another level of control.
Using one generic machining specification for all three can add cost while still failing the true requirements.
Stage 8: Deburr Without Damaging the Part
Deburring transparent plastic requires restraint.
An aggressive hand tool can quickly turn a small burr into a scratch, rounded edge, or inconsistent chamfer.
The deburring process should match the drawing.
Some edges may receive a defined machined chamfer rather than manual edge breaking. Others may be lightly deburred because they are hidden from view.
A premium cosmetic edge may become part of the later polishing process.
Stage 9: Finish the Surface According to Its Function
Not every PMMA surface should be polished.
This is one of the easiest ways to control cost.
An internal mechanical pocket can often remain as-machined. A front display surface may require excellent clarity. An edge transmitting light may require a different specification from an edge hidden inside an enclosure.
Possible finishing approaches include controlled mechanical polishing, edge polishing, flame treatment where appropriate, specialized machining, and advanced transparent-plastic finishing processes.
The correct process depends on geometry, tolerance, material grade, optical requirement, chemical exposure, and production volume.
Stage 10: Inspect Dimensions and Appearance
A complete inspection plan should separate measurable geometric requirements from visual acceptance criteria.
Dimensional inspection may use calipers, micrometers, gauges, optical measurement, CMM equipment, or other methods depending on tolerance and feature geometry.
Cosmetic inspection may require defined lighting, viewing distance, inspection angle, surface zones, sample standards, or agreed limits for scratches and haze.
Without those definitions, buyer and supplier can both believe they met the specification while interpreting “good appearance” differently.
Stage 11: Protect the Finished Component
Packaging is effectively the final manufacturing operation for a transparent part.
A perfectly polished component can lose its value during shipping if surfaces rub against one another.
Individual protection, appropriate film, separators, trays, bags, or custom packaging may therefore be justified for high-cosmetic parts.
This should be included in the production plan rather than treated as an afterthought.
Choosing an Acrylic PMMA Machining Machine
Buyers sometimes focus on whether the supplier has a “PMMA CNC machine.” In reality, acrylic does not require one single category of specialized machine.
The correct equipment depends on what the component needs.
Three-Axis CNC Milling
A 3-axis machining center can handle a large range of acrylic components, including plates, pockets, holes, profiles, simple housings, fixtures, windows, and many prototype parts.
If features are accessible from straightforward orientations, 3-axis machining may provide an efficient solution.
Four-Axis Machining
A rotary axis can reduce manual repositioning for parts containing features around multiple sides or cylindrical geometry.
Fewer manual setups may improve efficiency and reduce opportunities for handling damage.
Five-Axis CNC Machining
Five-axis capability becomes attractive when transparent components contain compound angles, curved optical geometry, features across several faces, difficult access, or complex freeform surfaces.
The main benefit is not simply that five-axis technology sounds more advanced.
Its value comes from access and setup reduction.
Every time a component is removed, repositioned, and reclamped, alignment and cosmetic-handling risks may increase. If more features can be completed in one controlled setup, geometric relationships may improve.
JUCHENG states that its equipment base includes more than 150 CNC machines and more than 25 five-axis machining centers. For buyers of complicated transparent components, this type of capacity may support both geometry and production scaling.
Tournage CNC
Round acrylic parts can also be turned.
Potential examples include transparent bushings, rings, cylindrical housings, optical bodies, sleeves, fluid-related components, and prototype lens forms.
Tool sharpness and heat control remain important because the same PMMA behavior applies even though the machine architecture changes.
Specialized Finishing Equipment
The machining center is only part of the equipment decision when optical appearance matters.
A supplier may also need polishing capability, inspection systems, controlled cleaning, protective handling, and specialized transparent-surface processes.
For very high-end surfaces, diamond finishing may become relevant depending on geometry and specification.
This leads to a useful sourcing rule:
Do not buy machine specifications. Buy the complete process capability needed for your part.
A Practical Acrylic PMMA Machining Procedure for Engineering Teams
A buyer does not need to program the CNC machine, but understanding the production logic makes supplier evaluation much easier.
- Define function first. State whether the component is structural, cosmetic, optical, fluidic, protective, or a combination.
- Select or review material grade. Decide whether cast or extruded PMMA matches the requirement.
- Mark critical surfaces. Separate optical, cosmetic, sealing, mounting, and noncritical surfaces.
- Apply tolerances by function. Avoid assigning extreme precision to every dimension.
- Perform DfM review. Examine walls, radii, holes, pockets, threads, tool access, and assembly loads.
- Create the machining sequence. Plan workholding, roughing, finishing, drilling, multi-face operations, and handling.
- Validate tooling and cutting conditions. Confirm clean chip formation and avoid excessive heat.
- Inspect an early sample. Measure dimensions and examine transparent surfaces before committing to volume.
- Apply appropriate finishing. Polish only the surfaces that require it and protect critical geometry.
- Complete final inspection and packaging. Confirm both engineering and cosmetic requirements before shipment.
This sequence may appear more detailed than a typical “load material and press Cycle Start” description, but each step addresses a real failure mode.
What Reddit CNC Discussions Teach About Acrylic
Professional processing guides are useful, but machinist communities offer another type of evidence: repeated shop-floor failure patterns.
Several themes recur in Reddit CNC and hobby CNC discussions about acrylic.
“It Keeps Melting”
Users often discover that very low feed is not automatically safer.
When the cutting edge is not taking a healthy chip, rubbing can increase heat. That is why experienced users frequently discuss feed in relation to RPM rather than treating either number independently.
“My Cutter Is Packed With Plastic”
This usually points back toward chip evacuation, heat, and cutter geometry.
Users repeatedly mention O-flute or single-flute tools because these cutters provide significant flute space for removing plastic chips.
Air blast is another common shop-floor recommendation because a chip that leaves the cutting zone cannot be repeatedly cut and reheated.
“The Edge Is Smooth but Not Clear”
This highlights the difference between machining finish and optical finish.
A machined wall may feel smooth to a finger while still scattering enough light to appear cloudy.
The requirement needs to be defined in optical and cosmetic terms rather than using the word “smooth” alone.
“Flame Polish It”
Flame polishing appears frequently in acrylic discussions because it can produce attractive edges rapidly.
However, a professional production decision should consider more than visual improvement.
Thermal effects, internal stress, bonding, chemical exposure, dimensional requirements, geometry, and future service conditions may determine whether the method is appropriate.
What works for a display piece may not automatically be the best choice for a precision medical or optical assembly.
Where Facebook and Manufacturing Communities Add Another Perspective
Fabrication and CNC groups often discuss acrylic from a practical production viewpoint rather than a material-science viewpoint. Typical conversations revolve around which router bit leaves a cleaner edge, why one sheet melts while another cuts normally, whether cast material is worth the additional cost, how much polishing is required, and how to keep chips from welding to the tool.
These discussions are useful because they reveal what customers actually experience.
They also show why copying a parameter from another person’s machine may not solve the problem.
Two users can both say “6 mm acrylic,” yet one may be cutting cast stock with a sharp single-flute carbide tool on a rigid CNC router while another is cutting extruded material with an older multi-flute cutter. Their spindle power, rigidity, RPM range, workholding, and cooling conditions may be completely different.
Good process engineering extracts the principle from these conversations rather than blindly copying the number.
The principle is consistent: create a clean cutting action, remove heat through the chip, evacuate chips efficiently, reduce unnecessary rubbing, and build the finishing strategy from a good machined surface.
Application Deep-Dive: Optical and Lighting Components
Lighting is one of the applications where PMMA’s appearance and manufacturing flexibility can create significant value.
Light guides, transparent covers, illumination components, optical prototypes, LED-related parts, indicator elements, and optical housings may contain geometry that cannot be created through simple sheet cutting.
For example, a light-management part may need a transparent outside wall, internal pockets, mounting features, optical surfaces, and precise relationships to an LED or sensor.
CNC machining allows these features to be created from one block during development.
The challenge is that optical performance may depend on more than nominal dimensions.
Surface texture can affect light behavior. Tool marks may become visible when LEDs illuminate the edge. Polishing could change geometry. A scratch that is barely visible under room lighting may become obvious when light enters the material.
This means lighting projects should identify which surfaces transmit, reflect, distribute, or merely contain light.
That information helps the supplier spend manufacturing effort where it affects product performance.
Medical and Laboratory Applications
Clear components also have obvious value in equipment where operators need to observe internal conditions.
Potential applications include transparent covers, instrument components, laboratory fixtures, prototype flow systems, manifolds, visualization chambers, housings, and equipment windows.
A transparent manifold illustrates why machining quality matters.
The part may contain interconnected channels and ports. Engineers may want visual access to the fluid path. Dimensional accuracy matters because the manifold interfaces with fittings and seals. Surface quality may matter because rough internal regions could affect flow or cleaning.
Material documentation and quality management may also become important.
JUCHENG publishes ISO 13485-related manufacturing capability alongside its general CNC and PMMA services. For medical-device buyers, the relevant value is not the certificate name by itself but the disciplined documentation, traceability, inspection, and process-control framework expected from regulated manufacturing environments.
The final suitability of PMMA for a medical application still depends on the specified grade, contact conditions, sterilization method, chemicals, regulatory requirements, and end use.
Automotive and Transportation Development
PMMA can also be useful in automotive development, particularly for lighting prototypes, display systems, transparent covers, interior components, test fixtures, and visual validation models.
CNC machining is especially attractive before mass-production tooling is finalized.
An engineering team could test several geometric versions without modifying a mold each time. Mounting points, optical relationships, outside shape, and assembly interfaces can be changed digitally and machined again.
This shortens the learning loop between CAD and physical testing.
Automotive programs may also care about process documentation, dimensional control, repeatability, and supplier quality systems. JUCHENG lists IATF 16949 among its quality certifications, which can be relevant when a customer is evaluating the broader manufacturing discipline behind prototype or production work.
Électronique et instrumentation
Acrylic is often considered for instrument windows, display covers, sensor windows, indicator panels, transparent enclosures, and prototype electronic housings.
The key design issue is often integration.
A display window may look simple but could include mounting holes, snap-related geometry, adhesive zones, recesses, light-blocking features, button clearances, and alignment surfaces.
CNC machining can combine these features without tooling investment.
At low and medium volume, that flexibility may be more valuable than the lowest theoretical unit cost.
Industrial Equipment and Machine Components
Industrial applications may use clear polymers for inspection covers, machine windows, transparent fixtures, visualization components, guards, measurement fixtures, and equipment housings.
Here material selection should consider impact risk carefully.
PMMA offers excellent visual qualities but is not always the best transparent plastic for high-impact guarding. Polycarbonate could be more appropriate when toughness is the primary safety requirement.
A responsible supplier should therefore be willing to discuss when acrylic is not the best choice.
Good material selection protects the application, not the material supplier.
PMMA vs Polycarbonate: Avoid Choosing by Transparency Alone
PMMA and polycarbonate are frequently compared because both can be transparent.
The right choice depends on priorities.
PMMA may be attractive when clarity, UV behavior, surface appearance, rigidity, and polished aesthetics are important.
Polycarbonate may be attractive where impact resistance and toughness carry more weight.
The purchasing mistake is asking, “Which plastic is better?”
A better question is, “What failure can this product least tolerate?”
If optical appearance is central, PMMA may deserve priority.
If impact failure creates a major safety concern, polycarbonate should be evaluated.
If neither transparency nor optical performance matters, materials such as POM, nylon, PEEK, ABS, or other engineering plastics may offer more appropriate performance depending on the application.
Tolerance: Precision Without Overengineering
PMMA can be precision machined, but buyers should resist the habit of assigning the tightest possible tolerance to every feature.
Tolerance should follow function.
A locating bore may control assembly alignment.
A sealing surface may need specific flatness.
A light-guide interface may need accurate positioning.
A hidden outside wall may only need to fit inside an enclosure.
Giving all four features the same extreme tolerance increases machining and inspection cost without necessarily improving the product.
Polymers also respond to temperature and stress differently from metals. Thin geometry may move more easily. Clamping can affect measurement. A component measured immediately after machining may also behave differently once it reaches thermal equilibrium.
Therefore, the most professional tolerance discussion includes material, feature size, geometry, environmental conditions, inspection method, and functional requirement.
Why Optical Parts Need More Than Dimensional Inspection
A CMM can tell you whether a feature is located correctly.
It cannot, by itself, define whether the customer will accept a scratch across a visible window.
Transparent-part inspection should therefore combine dimensional and cosmetic systems.
For high-value work, an RFQ may define cosmetic zones.
Zone A could be a front-facing display window where scratches are highly restricted.
Zone B could be a polished outside edge where minor variation may be acceptable.
Zone C could be an internal mounting area where machining marks are allowed.
This type of specification makes quality objective and reduces arguments after delivery.
It also controls cost because the supplier does not need to treat every square millimeter as an optical face.
The Hidden Cost of Polishing Everything
Many buyers assume polishing is a small final step.
It may be one of the largest cost drivers.
Manual polishing consumes labor. Multiple abrasive stages consume time. Complex geometry makes access difficult. Maintaining sharp edges and dimensions while polishing requires skill.
If every surface is specified as “mirror clear,” the supplier may spend more time finishing the part than machining it.
This is why the design team should separate visual requirements from engineering requirements.
Ask whether an internal pocket actually needs optical transparency.
Ask whether the bottom of a mounting recess can remain as-machined.
Ask whether only the exposed perimeter requires polishing.
Ask whether the original stock face can remain untouched instead of being resurfaced.
These decisions can reduce price without changing performance.
Installation: A Perfect PMMA Part Can Still Fail During Assembly
The machining supplier controls the part until shipment. The assembly process controls what happens next.
PMMA should not be forced into a misaligned assembly.
Fasteners should not automatically receive metal-part torque values. Localized pressure around screws can create stress. Sharp metal edges contacting acrylic may concentrate load.
Depending on design, washers, shoulder fasteners, inserts, compliant interfaces, or controlled clearance could distribute force more effectively.
Thermal expansion should also be considered when a relatively large acrylic component attaches to a metal structure.
If both materials respond differently as temperature changes, a completely rigid mounting arrangement may generate stress.
The design may need clearance or a mounting strategy that permits controlled movement.
Maintenance: Cleaning Chemistry Matters
A transparent surface naturally attracts frequent cleaning.
That makes chemical compatibility important.
Some aggressive cleaners or solvents may damage acrylic, particularly when a part already contains machining or assembly stress.
Abrasive cloths can also scratch polished faces.
For demanding commercial applications, cleaning instructions should be treated as part of the product specification.
Use cleaning methods known to be compatible with the selected PMMA grade. Test uncertain chemicals before release. Avoid assuming that a cleaner suitable for ordinary glass is automatically suitable for acrylic.
Protective maintenance can preserve optical quality far longer than repeated corrective polishing.
A Realistic Case Study: The Transparent Sensor Housing
Consider a representative sourcing case based on common transparent-part failures.
A North American equipment developer needs 60 transparent sensor housings for validation testing. Each housing contains a rectangular pocket, four mounting holes, a cable opening, two alignment features, a polished outer perimeter, and a transparent front viewing surface.
The first supplier sees the geometry as a standard plastic milling job.
The component is programmed quickly. Generic cutters are used. Roughing and finishing are combined where possible to reduce cycle time.
The first articles pass most dimensional checks.
But under assembly lighting, several problems appear.
The pocket walls look cloudy. The perimeter has inconsistent transparency. One corner contains a small chip. Fine white lines develop around one mounting hole after screws are installed.
The supplier proposes more polishing.
This increases the price but does not address the cracking.
Step 1: Separate the Problems
The project team first stops treating the defects as one issue.
The cloudy pocket is a machining and surface-finish problem.
The inconsistent perimeter involves machining plus polishing.
The chipped corner relates to toolpath, material support, or finishing load.
The cracked hole involves machining stress, geometry, and assembly load.
Each defect needs its own root-cause path.
Step 2: Review Material
The team confirms whether the selected PMMA grade is appropriate for complex machining and polishing.
A cast grade is evaluated because machining quality and optical appearance are priorities.
Step 3: Review the Tooling and Chip Formation
The next trial uses sharp plastic-suitable tooling and a process designed around clean chip evacuation.
Instead of treating low feed as automatically safe, the machining engineer evaluates the relationship between feed, spindle speed, cutter geometry, tool engagement, and chips.
Step 4: Separate Roughing and Finishing
Roughing leaves controlled material on cosmetic walls.
A dedicated finishing operation removes the final allowance.
This reduces deep cutter marks and makes the polishing stage more predictable.
Step 5: Review the Mounting Hole
The hole geometry and distance from the edge are checked. The drilling process is reviewed for heat and breakthrough damage.
The assembly team also reduces unnecessary fastener load and considers how force is distributed around the hole.
Step 6: Define the Cosmetic Specification
Instead of saying “all surfaces must be clear,” the drawing identifies the viewing face and perimeter as critical cosmetic areas.
Internal mechanical surfaces are allowed to remain as-machined where appearance has no functional effect.
The Commercial Result
The revised process may have a slightly longer CNC cycle than the original aggressive process.
However, polishing labor drops, rejection risk falls, and assembly failures decrease.
The total cost of acceptable parts can therefore be lower even though the machine does not run at the fastest possible removal rate.
This is the manufacturing lesson buyers should remember.
The lowest machining time is not always the lowest production cost.
How to Evaluate an Acrylic CNC Supplier
Choosing a supplier only by quoted unit price makes transparent parts unnecessarily risky.
A stronger supplier review looks at the manufacturing system.
Does the Supplier Understand Plastics?
A company that mainly cuts steel and aluminum may own excellent equipment but still need specific process experience for transparent polymers.
Ask what acrylic grades it commonly machines.
Ask how it distinguishes cast from extruded stock.
Ask how it responds when chips begin welding to the cutter.
Ask how optical and cosmetic requirements affect its toolpath.
The answers reveal much more than a generic statement that “we can machine all plastics.”
Can the Supplier Separate Machining From Finishing Requirements?
An experienced supplier should understand that a precision mounting face, transparent edge, polished window, and hidden pocket may all need different manufacturing strategies.
This distinction helps control price.
Does It Have Enough Machine Capability?
Machine quantity alone does not guarantee quality, but capacity becomes important when a project moves from prototype to production.
A shop may successfully machine ten prototype components but struggle when demand becomes 1,000 pieces per month.
Buyers should consider both technical capability and available scale.
Does It Have Suitable Inspection?
Inspection should match tolerance.
Complex multi-face geometry may require coordinate measurement or optical systems rather than simple handheld tools.
The supplier should also understand cosmetic inspection if appearance is important.
Does It Provide DfM Feedback?
A supplier that only accepts the CAD file without asking questions may miss opportunities to reduce cost or risk.
Good DfM feedback could identify fragile walls, unrealistic inside corners, unnecessarily tight tolerances, difficult polishing areas, or thread concepts that do not match repeated use.
Can It Support Traceability and Quality Documentation?
This becomes more important for medical, automotive, industrial, and other controlled supply chains.
Ask which quality system applies to the project and what inspection or material documentation can be supplied.
Why Choose JUCHENG for Precision PMMA CNC Work?
JUCHENG positions its transparent-plastic capability around precision machining combined with controlled post-processing rather than simple acrylic cutting.
The company’s published capabilities include CNC machining of cast acrylic and other transparent materials for applications such as optical components, light guides, housings, medical manifolds, windows, and related engineered parts.
13+ Years of Precision Manufacturing Experience
Experience becomes particularly important when a process has several interacting variables.
Acrylic machining is not difficult because one isolated parameter is mysterious. It is difficult because material, geometry, workholding, cutter condition, feeds, heat, chip removal, tolerance, and finishing influence one another.
JUCHENG reports more than 13 years of precision manufacturing experience, giving engineering teams access to a broader manufacturing background than a simple routing service.
150+ CNC Machines and 25+ Five-Axis Centers
JUCHENG’s published manufacturing platform includes more than 150 CNC machines and more than 25 five-axis machining centers.
For simple acrylic plates, that scale may not be necessary.
For projects involving complex housings, multi-surface geometry, optical features, rapid development cycles, or increased production quantities, broader equipment capacity can become valuable.
Five-axis machining may also reduce setups for complicated geometry, which can improve feature relationships and reduce handling of sensitive transparent surfaces.
Transparent Material Experience
JUCHENG maintains dedicated information around transparent-material machining, including acrylic PMMA and polycarbonate.
This matters because transparent polymers create cosmetic and optical requirements that do not exist in the same way with ordinary opaque components.
A buyer may need clear communication about polishing, light transmission surfaces, scratch protection, tool marks, and visual inspection.
Cast Acrylic Capability
JUCHENG specifically promotes cast PMMA for demanding precision and optical applications.
Its material guidance discusses components such as light guides, medical manifolds, lenses, and premium transparent products.
This focus may be useful for projects where machining behavior and final clarity carry more weight than purchasing the least expensive acrylic stock.
Quality Systems for Automotive and Medical Programs
JUCHENG publishes certifications and quality systems including ISO 9001, ISO 13485, IATF 16949, and ISO 14001.
Different certifications serve different management and industry requirements, but together they provide buyers with evidence of a structured approach to manufacturing quality, documentation, environmental management, and controlled production.
For a PMMA project, qualification requirements should still be reviewed specifically rather than assuming a certification automatically qualifies a part for its final application.
Traçabilité des matériaux
JUCHENG states that its quality system supports material traceability from source supplier through finished components.
This can be especially valuable when customers need documented material identity or controlled manufacturing records.
Precision Inspection
Machining capacity without inspection capacity creates an incomplete system.
JUCHENG’s precision-manufacturing operations include CMM inspection capability, including Zeiss measurement equipment described within its published manufacturing materials.
For complicated acrylic housings, multi-face mounting relationships, precision holes, and controlled interfaces, measurement capability can help verify whether the machining process actually produced what the CAD model intended.
Prototype Through Production
Many acrylic projects begin as prototypes.
The supplier that helps solve the prototype should ideally understand what will change when the order becomes a production program.
Fixturing may become more specialized. Inspection plans may become formalized. Tool life needs to be controlled. Packaging may require standardization. Material purchasing and batch traceability may become more important.
JUCHENG’s combination of equipment volume, multi-axis capability, engineering support, and quality infrastructure can support this transition from initial validation toward repeat manufacturing.
How to Prepare a Better RFQ
A good quotation begins with information.
Providing only a screenshot and quantity forces a supplier to make assumptions. Those assumptions often return later as price changes or quality disagreements.
A useful RFQ should include a 3D model where available and a controlled 2D drawing for dimensions that cannot be communicated by geometry alone.
Specify the PMMA grade if already selected.
If the material remains open, describe the application instead of guessing.
Mark critical dimensions.
Identify optical or cosmetic surfaces.
Define polishing expectations.
Describe threads, inserts, bonding surfaces, sealing areas, and mating components.
State prototype quantity and expected future production volume.
Explain environmental conditions such as UV exposure, temperature range, impact, cleaning chemicals, and contact with fluids.
Finally, tell the supplier what failure matters most.
Does the part fail if the edge has a visible tool mark?
Does it fail if a hole moves 0.05 mm?
Does it fail if the window creates optical distortion?
Does it fail if it cracks after repeated fastening?
This information helps engineering effort follow the actual business requirement.
Cost Reduction Without Sacrificing Quality
When a PMMA quotation looks expensive, there are better options than immediately searching for the cheapest supplier.
First, review tolerance.
Relax noncritical dimensions while protecting actual assembly interfaces.
Second, review cosmetic surfaces.
Polishing only visible or optical zones may save substantial labor.
Third, review geometry.
Very deep pockets, extreme wall thickness ratios, tiny internal radii, and difficult undercuts increase machining complexity.
Fourth, review stock dimensions.
A design that fits standard stock efficiently can reduce material waste.
Fifth, review setup count.
A small design change may allow several features to be machined in fewer orientations.
Sixth, share expected production volume.
The optimal fixture for ten parts may not be the optimal fixture for ten thousand.
These changes reduce total manufacturing effort rather than merely shifting margin from supplier to buyer.
When CNC Machining Is Not the Right PMMA Process
CNC machining is powerful, but an engineering guide should also explain its limits.
If the part is simply a large flat profile with no pockets, precision 3D features, or tight machined interfaces, laser cutting or another sheet process may be more economical depending on edge and stress requirements.
If annual volume becomes extremely high and geometry suits molding, injection molding may reduce unit cost despite the initial tooling investment.
If the product is mainly a bent sheet structure, forming and fabrication may be more efficient.
CNC becomes particularly valuable when the project needs complex geometry, close feature relationships, fast design changes, low-to-medium quantities, precision holes or pockets, three-dimensional surfaces, or prototype flexibility.
A capable supplier should help the customer choose the process that matches the product rather than forcing every project onto a CNC machine.
FAQ: Acrylic PMMA CNC Machining
1. Why does PMMA melt while CNC machining?
Melting usually means excessive heat is accumulating around the cutter. Low feed relative to spindle speed, dull tools, poor chip evacuation, unsuitable cutter geometry, excessive engagement, or recutting chips may all contribute. The process should create clean chips rather than allow the cutting edge to rub the acrylic.
2. What type of CNC cutter is suitable for acrylic?
Sharp carbide cutters designed for plastic are commonly used. Single-flute and O-flute designs are popular because their open flute geometry can support effective chip removal. The ideal tool still depends on machine type, feature size, material grade, required finish, depth, and operation.
3. Is cast PMMA better than extruded PMMA for CNC machining?
Cast acrylic is often preferred for complex machining and high-quality transparent parts because of its favorable machining and optical characteristics. Extruded acrylic can still work well for suitable products and may offer cost or sheet-thickness advantages. Application requirements should decide the grade.
4. Can CNC-machined acrylic become optically clear?
Yes. However, standard milling does not automatically leave an optical finish. A project may require dedicated finishing passes, controlled polishing, specialized tools, or advanced finishing methods. Optical surfaces should be identified during quotation because finishing affects cost and dimensional planning.
5. Why does acrylic crack around screw holes?
Possible causes include machining stress, poor drilling conditions, insufficient edge distance, brittle geometry, excessive fastening load, countersink stress, chemical exposure, or a combination of these factors. Both the CNC process and final assembly should be reviewed.
6. Can PMMA hold tight CNC tolerances?
Yes, precision acrylic components can be produced, but realistic tolerance depends on geometry, dimensions, wall thickness, material grade, thermal conditions, finishing operations, and inspection method. Tight tolerances should normally be assigned to functional features instead of every dimension.
7. Is five-axis CNC required for PMMA?
No. Many acrylic parts can be produced efficiently with three-axis machining. Five-axis CNC becomes useful for complex multi-face geometry, compound surfaces, difficult tool access, or designs where reducing setups improves feature relationships and handling.
8. How should I clean a precision acrylic component?
Use methods and cleaning agents confirmed to be compatible with the selected PMMA grade. Avoid abrasive materials and unverified aggressive solvents. Chemical compatibility becomes especially important when the component contains residual mechanical or assembly stress.
Final Engineering Perspective: The Clear-Part Rule
PMMA rewards good process control because every stage becomes visible in the finished component.
A sharp cutter leaves evidence.
A dull cutter leaves evidence.
A well-designed finishing pass leaves evidence.
Poor chip evacuation leaves evidence.
Good polishing leaves evidence.
Bad handling leaves evidence.
That visibility is exactly why transparent components should not be sourced as commodity machined plastic.
The highest-value suppliers understand that dimensional accuracy, optical appearance, material integrity, finishing, inspection, and packaging are connected.
For engineers, the most effective strategy begins by defining the real performance requirement. Choose the PMMA grade around the application. Design geometry around realistic machining behavior. Identify critical surfaces. Use precision only where it creates value. Build surface finishing into the manufacturing plan. Consider assembly stress before the first part is produced.
For procurement teams, supplier evaluation should go beyond hourly rate and machine brand. Look at plastic-machining knowledge, equipment capability, inspection, material control, quality systems, DfM communication, transparent-part finishing, and the ability to move from prototype to repeat production.
The objective is not simply a clear acrylic component.
It is a component that remains clear, fits correctly, survives assembly, performs in its application, and can be produced repeatedly at a commercially sensible cost.
Start a Precision Acrylic Project With JUCHENG
If your project involves transparent housings, light guides, optical prototypes, medical manifolds, instrument windows, automotive development parts, lighting components, laboratory devices, or other precision PMMA components, early manufacturing review could prevent the defects that become expensive later.
JUCHENG provides CNC machining services supported by 3-axis, 4-axis, and 5-axis manufacturing capability, precision inspection, transparent-material processing experience, DfM support, and established quality-management systems.
Visitez JUCHENG Usinage CNC to submit your CAD model and project requirements.
For PMMA-specific manufacturing capability, buyers may also review JUCHENG’s Cast Acrylic CNC Machining et Transparent Materials Machining resources.
For independent technical background, PLEXIGLAS publishes detailed acrylic processing guidance covering operations such as drilling and machining. See PLEXIGLAS Processing Guidance.
When requesting a quote, provide the CAD model, drawing, material requirement, quantity, tolerance, critical cosmetic zones, optical expectations, assembly method, and expected production volume. Those details allow the manufacturing team to evaluate not only whether the component can be cut, but how it could be produced reliably from first article through repeat production.
That difference—from simply cutting transparent plastic to engineering a repeatable manufacturing process—is what ultimately determines whether an acrylic CNC project becomes a successful production component or another expensive round of cloudy prototypes.
[1]: https://www.jccncmachining.com/materials/pmma-acrylic/cast-acrylic/?utm_source=chatgpt.com “CNC Cast Acrylic Machining | Optical Clear PMMA Parts | Jucheng”
[2]: https://www.plexiglas.de/en/service/processing/drilling-plexiglas?utm_source=chatgpt.com “Drilling PLEXIGLAS”