From Layer Lines to Liquid Smooth: Unveiling Vapor Polishing
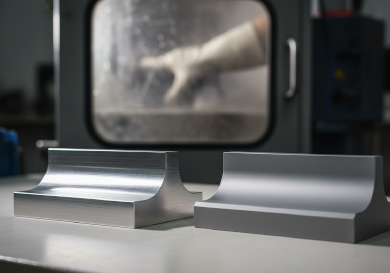
For 3D printing enthusiasts and professionals, the journey from digital model to physical object is filled with excitement. Yet, one persistent artifact of the additive manufacturing process often remains as a final hurdle: the visible layer lines. While sanding and priming can help, they are labor-intensive and can compromise fine details. Enter vapor polishing, a sophisticated post-processing technique capable of transforming a rough, layered print into a part with a smooth, glossy, almost injection-molded finish. This article serves as your comprehensive guide to mastering this powerful method for achieving flawless 3D prints.
What is Vapor Polishing? The Science of Smoothing
Vapor polishing is a chemical post-processing technique primarily used for smoothing 3D printed parts made from specific thermoplastics. At its core, the process involves briefly exposing a printed object to the vapors of a solvent. These solvent vapors gently melt the very outermost surface of the plastic, causing the polymer chains to reflow. As the vapor dissipates and the part dries, the surface solidifies again, but now without the microscopic ridges and valleys that create the characteristic layered appearance.
The key to the process is controlled, superficial melting. The goal is not to melt the entire part, but only a tiny fraction of the surface—often just microns deep—just enough to erase layer lines and seal the surface pores without distorting the part's geometry. The most common pairing is acetone for ABS (Acrylonitrile Butadiene Styrene) and ASA (Acrylonitrile Styrene Acrylate) prints. For materials like PLA (Polylactic Acid), which is not readily soluble in acetone, other solvents like ethyl acetate or tetrahydrofuran (THU) may be used, though with greater caution due to their properties.
How the Vapor Polishing Process Works: A Step-by-Step Breakdown
The basic setup for vapor polishing can range from a simple DIY jar to a professional-grade vapor polishing machine. The fundamental principles, however, remain consistent:
- Preparation: The 3D printed part is cleaned of any dust, oils, or support material residue. It is then suspended inside a sealed container (like a glass jar or tank), ensuring it does not touch the liquid solvent at the bottom.
- Vapor Generation: A small amount of solvent is placed at the bottom of the container. In passive systems, the solvent naturally evaporates at room temperature, filling the container with vapor. In active systems, gentle heating (like a heated bath or warming plate) accelerates vapor generation for more consistent and faster results.
- Exposure: The part is exposed to the saturated solvent vapor environment. The exposure time is critical and varies widely—from 30 seconds to several minutes—depending on the material, part thickness, desired smoothness, and solvent concentration.
- Re-flow and Smoothing: The solvent vapor condenses on the cooler surface of the part, slightly dissolving the outer polymer layer. Surface tension causes the molten polymer to flow, smoothing out imperfections and layer lines.
- Curing and Drying: The part is removed from the vapor chamber and allowed to dry completely. Any residual solvent evaporates, leaving behind a hard, glossy, and sealed surface.
The Compelling Benefits and Inherent Challenges
Vapor polishing offers a suite of advantages that make it a go-to technique for demanding applications, but it is not without its considerations.
Key Advantages of Vapor Polishing
- Exceptional Surface Finish: Achieves a high-gloss, professional finish that is difficult to replicate with mechanical methods, enhancing visual appeal and perceived quality.
- Preservation of Dimensional Accuracy: When done correctly, it minimally affects the part's dimensions, unlike aggressive sanding which can remove significant material and alter tolerances.
- Sealed and Hygienic Surface: The process fuses the surface layer, closing microscopic pores. This makes the part water-resistant, easier to clean, and ideal for food-safe molds or medical prototypes (with appropriate, certified materials).
- Improved Mechanical Properties: It can slightly increase the part's strength by homogenizing the surface and reducing stress concentrators like layer lines, potentially improving impact resistance.
- Efficiency for Complex Geometries: It effortlessly smooths intricate details, internal channels, undercuts, and textures that are impossible to reach with sandpaper or tools.
Important Considerations and Risks
- Material Limitations: It only works with amorphous thermoplastics like ABS, ASA, and polycarbonate (PC). Semi-crystalline plastics like PLA, Nylon, and PETG do not vapor polish well; they tend to become cloudy, sticky, or severely degrade.
- Overexposure Danger: Too long in the vapor will cause the part to become soft, droop, lose fine details, or even melt into a blob. It requires practice and timing.
- Health and Safety Hazards: Solvents used are typically flammable, volatile, and pose inhalation risks. This process MUST be performed in a well-ventilated area, preferably under a fume hood, with appropriate personal protective equipment (PPE) like nitrile gloves and safety goggles.
- Weakening of Thin Features: Very thin walls or fine details (like sharp corners) can be disproportionately affected and may lose definition.
Mastering the Craft: Best Practices for Success
To consistently achieve flawless results, follow these professional best practices:
1. Print and Prepare with Polishing in Mind
Start with a well-printed part. Higher resolution prints with smaller layer heights will polish to a finer finish than very coarse layers. Ensure the part is completely dry and clean. Any embedded dust or grease will be permanently sealed under the glossy surface. Consider printing a few small test cubes to dial in your exposure time before polishing a critical, large print.
2. Control Your Environment Rigorously
Consistency is king. Use a sealed container that is just large enough for your part. A smaller volume means faster vapor saturation and more predictable results. For DIY setups, a glass jar with a sealed lid is a common starting point. Monitor temperature closely, as it dramatically affects vapor pressure and reaction speed. Never heat solvents directly with an open flame or uncontrolled heat source.
3. The Art of Timing and Observation
Exposure time is the most critical variable. For a small part in a passive acetone jar, start with 2-3 minutes, check the finish, and adjust. Watch for the moment the surface changes from matte to glossy—this is often the signal to remove the part. Remember, the polishing action continues for a short time after removal as residual solvent evaporates. It's better to under-expose and repeat than to over-expose and ruin a print.
4. Prioritize Safety Above All Else
Store and handle all chemicals according to their Safety Data Sheets (SDS). Work in a ventilated space away from sparks or open flames. Have a fire extinguisher rated for chemical fires nearby. Dispose of used solvent and rags as hazardous waste, not down the drain.
Applications: Where Vapor Polishing Shines
Vapor polishing moves 3D printed parts from prototyping to end-use applications. Its unique benefits are leveraged across industries:
- Visual Prototypes and Presentation Models: For product designers and architects, a vapor-polished model presents a professional, market-ready appearance for client reviews and marketing materials.
- Functional Parts for Fluid Dynamics: Smoothed internal channels in manifolds, nozzles, or cooling systems reduce turbulence and improve fluid flow characteristics.
- Mold Making and Casting: A vapor-polished 3D print serves as an excellent master pattern for creating silicone molds, as the non-porous surface ensures easy demolding and a perfect cast.
- Light Pipes and Optical Components: The process dramatically increases light transmission and clarity for simple lenses, light guides, and decorative elements by eliminating surface scattering from layer lines.
- Consumer Products and Enclosures: Finished casings for electronics, cosmetic containers, or wearable items gain a tactile, premium feel and are easier to wipe clean.
Conclusion: Elevating Your Post-Processing Repertoire
Vapor polishing stands as one of the most effective techniques for achieving a truly professional finish on compatible 3D prints. It bridges the gap between the inherent texture of additive manufacturing and the smooth aesthetic demanded by end-use products. While it demands respect for its chemical and procedural requirements, the learning curve is manageable. By understanding the science, adhering to strict safety protocols, and practicing on test pieces, you can master this transformative process. Unlock the potential of your 3D prints, transforming them from layered prototypes into flawless, functional, and visually stunning objects ready for the spotlight.